Email: blogagri2@gmail.com

Chicken Brooder Guide: Heat, Safety & Chick Behavior

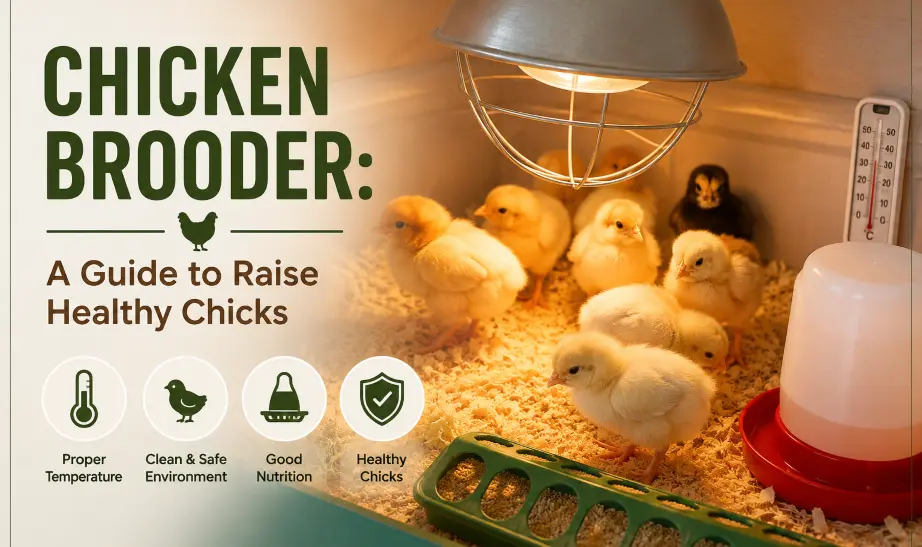
A brooder does not need to be complicated. It needs to give young chicks three things reliably: a safe warm area, a cooler place to move when they have had enough heat, and easy access to clean feed and water.
The thermometer helps you set up that environment. The chicks tell you whether it is actually working.
That is the part beginners sometimes miss.
A temperature chart might say the brooder should be around 95°F, but if every chick is jammed tightly beneath the heater, something is wrong. If they are pressed against the far wall trying to escape the warm area, that tells you something too.
Mississippi State University Extension describes comfortable chicks as being spread fairly evenly around the brooder. Cold chicks tend to huddle beneath the heat, chicks affected by a draft may gather to one side, and overheated chicks may move away from the heater and pant.
That is how I prefer to manage a small brooder: use the thermometer to get close, then watch the birds.
Quick Answer: Extension guidance commonly starts day-old chicks with a warm zone around 90–95°F (32–35°C) at chick level, followed by a gradual reduction as they grow. Treat those numbers as starting guidance, not a fixed calendar. Chick distribution, feathering, breed, room temperature, weather and overnight lows should determine how much supplemental heat they actually need.
If your chicks are coming from an incubator, prepare the brooder before hatch day. BlogAgri’s How to Incubate Chicken Eggs covers the incubation, lockdown and hatch stages that come before this guide.
What Is a Chicken Brooder?
A chicken brooder is a protected area where newly hatched chicks are kept while they still need supplemental warmth.
Under a hen, a chick solves its own temperature problem quite naturally. It slips under the hen when cold, comes out when warm, eats and drinks, then goes back underneath when it needs heat again.
A good artificial brooder tries to give the chick the same choice.
That means the brooder needs:
- A dependable warm zone
- A cooler zone
- Dry bedding
- Clean water
- Appropriate chick feed
- Fresh air
- Protection from direct drafts
- Predator protection
- Enough usable room for chicks to spread out
- A securely installed heat source
The goal is not to heat every corner to the same temperature.
Young chicks should be able to move closer to warmth or farther away from it as needed. Mississippi State’s poultry-heating guidance explains that this temperature gradient lets a chilled chick move closer to radiant heat while a warmer chick can move away.
Prepare the Brooder Before Chicks Arrive
I would rather find a faulty heater the night before the chicks arrive than one hour after putting them in the brooder.
Set everything up in advance.
University of Minnesota Extension recommends preparing and cleaning the poultry area before chicks arrive and having the heating equipment operating beforehand.
Before placing chicks, check:
- Heat source
- Thermometer
- Bedding
- Feeders
- Waterers
- Electrical cords
- Ventilation
- Drafts
- Brooder walls or cover
- Predator access
- Heater security
Run the heater long enough to see what happens to the temperature in the actual room.
A garage that feels comfortable at 2 p.m. can become much colder at 3 a.m.
That is especially important in spring, when daytime temperatures may look perfect but nights still turn cold.
Create a Warm Zone, Not a Hot Box
This is probably the most useful brooder-design principle.
Put the heat toward one part of the brooder.
Then leave enough cooler space for chicks to move away.
If the entire brooder is kept equally hot, an overheated chick has nowhere to go.
If the heated area is too small, cold chicks may pile together while competing for the warmest spot.
A brooder should therefore contain a temperature gradient rather than one uniform temperature. Mississippi State’s work on radiant brooders describes why a spread of warmer and cooler floor areas allows birds to choose where they are comfortable.
Practical Brooder Rule: A chick should be able to move toward heat without competing for one tiny spot and move away without leaving the safe brooder.
Chicken Brooder Temperature: Where to Start
A common starting range for newly hatched chicks is approximately 90–95°F at chick level.
University of Minnesota Extension recommends roughly 90–95°F during the first week for young chickens, while Penn State’s current brooding guidance uses approximately 95°F beneath the heat source.
Traditional guidance then reduces the temperature gradually as chicks grow.
You will often see something like this:
| Stage | Starting guidance | What should decide your adjustment |
|---|---|---|
| Newly hatched chicks | About 90–95°F in the warm zone | Chick behavior |
| Following weeks | Gradually reduce supplemental heat | Behavior + feather development |
| Older feathered chicks | Less heat may be needed | Ambient temperature |
| Transition outdoors | No universal age | Feathering + weather + overnight low |
The important part is the last column.
Do not stand beside a group of panting chicks saying, “The chart says they still need this temperature for three more days.”
Likewise, do not turn off heat on schedule when a cold snap has arrived and the birds are clearly huddling.
Penn State’s 2026 brooding guidance also recommends adjusting brooder conditions by observing the chicks rather than using temperature alone.
Measure Temperature Where the Chicks Are
A thermometer mounted high on a wall tells you the room temperature.
It does not necessarily tell you what a chick is experiencing.
University of Minnesota Extension recommends measuring brooding temperature near chick level.
That matters especially with radiant heaters and lamps.
Heat at the litter surface can differ substantially from air temperature farther above the birds.
Put the thermometer where it represents the chicks’ environment, but do not let the thermometer replace observation.
Let the Chicks Tell You Whether the Heat Is Right
This is where brooder management gets easier.
Stand back.
Give the birds a minute to forget you are there.
Then look at where they are.
Comfortable chicks
Comfortable chicks are generally spread through the usable brooding area.
They may sleep near the heater, walk to the feeder, drink, scratch through bedding and move between warmer and cooler areas.
Mississippi State describes even distribution and quiet, contented peeping as signs of comfortable conditions.
You do not need every chick arranged at equal distances like points on a diagram.
You are looking for a generally relaxed flock rather than a strong crowding pattern.
Signs Chicks Are Too Cold
Cold chicks commonly move toward the warmest available area.
Look for:
- Tight huddling beneath the heat source
- Chicks pushing underneath each other
- Persistent loud or sharp peeping
- Reluctance to leave the heated area
- Piling
- Reduced normal movement toward feed and water
Mississippi State Extension identifies sharp chirping and huddling beneath the brooder as classic signs that chicks are cold.
If that happens, do not immediately assume the heater simply needs to be hotter.
Check why the chicks are cold.
The problem may be:
- A heater that stopped working
- A cold draft
- An overnight temperature drop
- Heater positioned too high
- Insufficient warm area
- Too many chicks competing for one heated spot
Fix the actual problem.
Chicks Crowding on One Side May Mean a Draft
This is different from chicks clustering directly underneath the heat source.
If birds repeatedly crowd against one side or into one corner, check whether cool air is moving through the brooder.
Mississippi State specifically notes that chicks huddling to one side can indicate a draft.
Common draft sources include:
- Doors
- Windows
- Garage-door gaps
- Fans
- Air vents
- Cracks near floor level
Put your hand near chick level.
Sometimes the room feels perfectly comfortable at your height while cold air is moving straight across the bedding.
Signs Chicks Are Too Hot
Overheating young chicks is also a problem.
Look for:
- Chicks staying far from the heat source
- Panting
- Drowsiness
- Wings held away from the body
- Reduced normal activity
- Heavy concentration along the cool edges
Mississippi State says chicks that move away from the brooder, pant and appear drowsy may be too warm.
Penn State similarly advises that chicks which are too warm will position themselves as far from the heat source as possible.
Heat Reality Check: More warmth is not automatically safer. The job is to provide enough heat for chicks to regulate themselves—not to keep the whole brooder as hot as possible.
Brooder Plate vs Heat Lamp
Both can provide supplemental warmth when correctly selected and installed.
For a small backyard flock, many keepers consider radiant brooder plates because they provide localized warmth without trying to heat the entire air space.
University of Minnesota identifies brooder plates and panels among radiant poultry-heating options.
Brooder plates
A brooder plate should be:
- Properly sized for the flock
- Stable
- Adjusted to the chicks’ height
- Installed according to the manufacturer
- Positioned so chicks cannot become trapped
Do not assume a plate advertised for a certain number of chicks will work equally well when larger chicks are trying to crowd underneath it.
Watch the birds.
Heat lamps
Heat lamps are simple and widely used, but they require much more attention to fire safety.
The lamp is operating at high temperature above:
- Dry bedding
- Dust
- Wood
- Plastic
- Cardboard
- Feathers
That is not a combination to treat casually.
Heat Lamp Fire Safety
University of Minnesota Extension says heat lamps should be approved for livestock use, installed according to fire-risk instructions and never suspended by their electrical cord. It also recommends a cage around the bulb to reduce the chance of the hot bulb contacting bedding if something goes wrong.
Penn State Extension advises keeping heat lamps at least 20 inches from flammable material as a general rule and suspending heating equipment securely with chain or cable.
Safety Callout: Never trust a spring clamp as the only thing keeping a hot lamp out of dry bedding. Secure the fixture independently so a bumped lamp, failed clamp or curious growing chick cannot turn the brooder into a fire hazard.
If I use a heat lamp, I want:
- A livestock-rated fixture
- Correct bulb for the fixture
- Protective guard
- Secure chain or cable
- A second independent safety attachment where practical
- Safe distance from bedding and walls
- Cord protected from birds
- Water kept away from electrical connections
Never hang the lamp by its cord.
Be Careful With Cardboard Brooders
A large cardboard box can sometimes work as a temporary chick enclosure.
The problem comes when cardboard is casually combined with a hot lamp.
Cardboard, dry litter and high-temperature equipment demand more attention to clearance and fixture security.
If using any temporary brooder, ask:
- Can the heat source fall into it?
- Is combustible material too close to the heater?
- Can chicks reach the electrical cord?
- Will the container soften if the waterer leaks?
- Can chicks escape as they begin flying?
- Is ventilation adequate?
Do not improvise heater mounting over combustible material.
The brooder itself can be simple.
The heat installation should not be careless.
Ventilation Without a Cold Draft
A brooder needs fresh air.
Chicks breathe, drink, spill water and produce manure. Moisture builds in the litter, and poor ventilation can allow ammonia and humidity to increase.
But ventilation should not mean blowing cold air directly across young chicks.
Mississippi State’s poultry guidance emphasizes that chicks need fresh air while direct drafts should be avoided; adequate ventilation also helps remove moisture and keep litter dry.
Think of the difference this way:
Ventilation exchanges stale air.
A draft sends concentrated cool air across the birds.
You want the first without creating the second.
Do Not Seal the Brooder to Hold Heat In
When a room feels cold, it is tempting to close every opening.
That can create another problem.
You still need air exchange.
If the brooder smells strongly of ammonia, feels damp or develops condensation, do not simply add more heat.
Check:
- Ventilation
- Wet bedding
- Waterer leaks
- Bird density
- Cleaning frequency
Fresh air and dry litter are part of temperature management because a damp environment can make chicks harder to keep comfortable.
Bedding: Keep It Dry and Give Chicks Good Footing
For a home brooder, I care more about the condition of the bedding than about finding one supposedly perfect material.
It should be:
- Dry
- Absorbent
- Non-slippery
- Easy to replace
- Suitable for chicks
Wet litter should not be left until cleaning day.
Mississippi State notes that wet litter creates a cold, damp environment and stresses sanitation when raising young chicks.
Check especially beneath the waterer.
That is often where the first wet patch develops.
The Waterer Is Often the Source of Wet Litter
Young chicks are surprisingly good at making a mess of perfectly clean water.
They scratch bedding into it.
They bump it.
They step into it.
Sometimes they overturn it.
Check the waterer more than once each day during the first week.
If the same patch of bedding stays wet, fix the cause rather than endlessly throwing dry shavings over it.
You may need to:
- Stabilize the drinker
- Adjust its height as chicks grow
- Move it away from the busiest area
- Use a more suitable chick waterer
Keep it low enough that small chicks can drink safely.
Feeding Chicks in the Brooder
Brooder management does not need another complicated feed table.
Give young chicks a complete feed made for their life stage and provide fresh water continuously.
BlogAgri’s separate What to Feed Chicks, Pullets, Layers, and Broilers guide covers starter feed, growing pullets, broilers, layer feed, grit and calcium in detail.
For the brooder, the useful rule is simple:
Chick Feeding Rule: Let a complete chick ration do the nutritional work. Do not dilute it with large amounts of bread, grain, vegetables or treats.
BlogAgri’s feeding guide specifically recommends complete chick starter for young birds and explains why feed programs should follow the bird’s life stage rather than one rigid age chart.
Make Sure Chicks Actually Find Food and Water
Putting a feeder inside the brooder does not necessarily mean every chick has found it.
Watch newly arrived chicks.
Make sure they are:
- Moving normally
- Finding water
- Finding feed
- Not being pushed away by other birds
University of Minnesota recommends having water available immediately for chicks and using a complete feed appropriate to their growth stage.
If one chick is consistently isolated, weak or unable to reach feed and water, look more closely rather than assuming it will catch up later.
How Much Brooder Space Do Chicks Need?
I would avoid giving one number and pretending it fits every brooder.
Space needs change with:
- Chick age
- Breed
- Bird type
- Feeder size
- Waterer size
- Heat-source footprint
- How long chicks remain indoors
- Whether they have access to additional space
Penn State’s current guidance makes the broader point that space should increase as birds grow.
A brooder is too crowded if chicks cannot comfortably:
- Move between warm and cool areas
- Reach feed
- Reach water
- Lie down
- Avoid more aggressive birds
- Move without constantly climbing over each other
Plan expansion before they look crowded.
Day-old chicks make almost any container look enormous.
That does not last long.
Chicks Learn to Escape Quickly
A brooder wall that contains a tiny chick may become a perch a few weeks later.
As wing feathers develop, chicks start jumping and fluttering onto:
- Feeder edges
- Waterers
- Brooder walls
- Heater supports
If you need a cover, use one that remains well ventilated and does not create a fire risk around the heat source.
A secure hardware-cloth style cover can work better than sealing the brooder with a solid lid.
Recheck the brooder as the chicks grow.
What was safe on day three may not be safe on week three.
Check the Brooder Several Times a Day
The first few days deserve more observation, not more equipment.
A simple routine works well.
Morning
Before touching anything, look at the chicks.
Where are they?
If they are all packed beneath the heater, the night may have been colder than expected.
Then check:
- Heat
- Feed
- Water
- Bedding
- Chick activity
- Electrical equipment
Midday
Room temperatures may rise.
Look for heat avoidance or panting.
Check the water because active chicks can dirty a small drinker quickly.
Evening
Think about the coming night.
Check:
- Overnight forecast
- Heat-source security
- Water
- Bedding
- Drafts
- Brooder cover
- Electrical cords
Mississippi State recommends checking chick comfort several times daily and paying particular attention in the evening.
A Quick Chick-Behavior Troubleshooting Guide
| What you see | What it may be telling you | What to check first |
|---|---|---|
| Chicks spread comfortably around brooder | Conditions probably close to comfortable | Keep observing |
| Tight group beneath heater | Chicks may be cold | Temperature, heater, warm-area size |
| Chicks packed on one side | Draft may be present | Air movement at chick level |
| Chicks avoid heater | Brooder may be too warm | Temperature and heater position |
| Panting | Excessive heat possible | Reduce heat safely, check room temperature |
| Persistent sharp peeping | Discomfort/cold possible | Heat, drafts, water, general condition |
| Wet litter | Water leak or insufficient drying/ventilation | Waterer and airflow |
| One chick apart from flock | Individual issue possible | Feed, water, injury, health |
Extension descriptions of huddling, draft-side crowding, panting and even distribution support these as practical environmental clues.
This table is for brooder management, not diagnosis of disease.
If a chick remains weak, has breathing difficulty, cannot stand normally or is deteriorating despite correcting the environment, seek poultry-veterinary or local Extension advice.
Do Chicks Need Heat for Exactly Six to Eight Weeks?
No.
This is one of the main changes I would make to the old article.
Age is useful, but it is only one part of the decision.
Consider:
- Feather development
- Bird type
- Body size
- Indoor temperature
- Outdoor temperature
- Overnight lows
- Wind
- Rain
- Shelter
- Whether chicks have been gradually acclimated
University of Minnesota’s meat-chicken guidance illustrates this well: those birds may be substantially feathered by around four weeks and may need little or no additional heat under mild conditions, while cold weather can extend the need for heat.
That is not a rule telling every keeper to switch off the brooder at four weeks.
It demonstrates why a universal six- or eight-week deadline is not appropriate.
Different birds and different weather produce different answers.
Feathering Matters More Than the Calendar Alone
A fluffy day-old chick is covered mostly in down.
As it grows, true feathers replace that early covering.
A well-feathered bird can handle cooler conditions much better than a chick that still has substantial down.
Look at the actual bird.
Two chicks of the same calendar age may not have developed identically.
Breed and production type matter too.
This is why heat reduction should become a gradual response to the birds rather than a weekly ritual performed because a chart says it is Tuesday.
Reduce Supplemental Heat Gradually
Traditional Extension recommendations often suggest reducing the brooder temperature by roughly 5°F each week.
Use that as a starting framework.
Depending on your heater, gradual reduction may mean:
- Raising a heat lamp while staying within manufacturer and fire-safety requirements
- Adjusting an approved heater
- Raising a brooder plate as chicks grow
- Reducing the heated portion of the enclosure
- Allowing chicks access to a larger cool zone
Then watch the birds again.
If chicks use the heater only during the coldest hours, that tells you they are becoming less dependent on it.
Overnight Temperature Matters
This is where many early outdoor moves go wrong.
At 3 p.m. the sun is shining and the chicks are scratching happily outside.
At 3 a.m. the temperature may be 25 degrees lower.
Before removing supplemental heat or moving chicks outdoors permanently, check the overnight low, not just the daytime high.
Also consider wind and moisture.
A dry, protected cool night is different from a windy, wet one.
When Can Chicks Move Outside?
There is no single week that works for every flock.
I would move chicks outdoors permanently only after considering four things.
1. Feathering
Are they well feathered rather than mostly down-covered?
2. Weather
What are daytime and nighttime temperatures actually doing?
3. Housing
Is the coop dry, ventilated and protected from direct drafts?
4. Predator protection
Can local predators get through the wire, doors or roof?
If the chicks have spent their lives in a warm indoor room, gradual acclimation can also make the transition easier.
Do not move them from a warm house into a cold, damp night simply because they have reached a particular birthday.
For the next stage of management, BlogAgri’s Poultry Care for Beginners covers outdoor housing, water, predator protection, daily checks and general flock care.
Outdoor Brooders Need More Weather Planning
Brooding chicks in a shed, barn or outdoor poultry house can work well.
But the weather now becomes part of the brooder system.
Think about:
- Cold nights
- Wind
- Rain
- Power outages
- Moisture
- Predator pressure
- Large day/night temperature swings
An outdoor brooder that works beautifully on a warm afternoon may be completely different after midnight.
During the first week, I would check a new outdoor brooder after dark at least once rather than assuming the daytime setup will carry through the night.
Have a Plan for Heat-Source Failure
The younger the chicks and the colder the environment, the more important this becomes.
University of Minnesota recommends more than one lamp in some larger brooding setups so one failed bulb does not remove all heat.
For a small home flock, your backup might simply be:
- Spare approved brooder heater
- Spare properly rated bulb and fixture
- Another warm safe room
- Backup electricity where outages are common
A commercial poultry house obviously needs a different level of contingency planning.
The principle is the same:
Know what you will do before the heater fails.
Do Brooders Need a Fixed Humidity Percentage?
For ordinary chick brooding, I would not manage the brooder around a fixed relative-humidity target the way you manage an incubator.
Instead, watch practical moisture conditions:
- Is litter staying dry?
- Is condensation developing?
- Does the brooder smell strongly of ammonia?
- Is ventilation adequate?
- Is the waterer constantly soaking the bedding?
The incubator needs humidity management because moisture loss through the eggshell is part of embryo development.
After hatch, the problem changes.
Brooder moisture management is mostly about keeping chicks comfortable, providing water and maintaining dry, well-ventilated conditions.
If you are still at the egg stage, BlogAgri’s Chicken Egg Incubation Guide covers incubation humidity separately.
Common Chicken Brooder Mistakes
Heating the entire brooder to one temperature
Give chicks a warm zone and somewhere cooler to move.
Following the temperature chart without watching the chicks
Extension temperature ranges are starting points. Chick behavior is immediate feedback.
Assuming chicks must have heat for exactly six or eight weeks
Feathering and actual environmental temperature matter.
Ignoring panting
Young chicks can be overheated as well as chilled.
Ignoring chicks piled beneath the heater
Huddling can indicate insufficient warmth or inadequate heated area.
Ignoring one-sided crowding
Check for a draft.
Hanging a heat lamp by the cord
University of Minnesota specifically advises against this.
Relying only on the clamp
Secure heat equipment according to manufacturer and Extension fire-safety recommendations.
Keeping electrical connections beside water
Waterers spill. Keep electrical equipment protected and appropriately installed.
Closing the brooder to hold in heat
Young birds still need ventilation and dry air.
Letting wet bedding build up
Wet litter creates poor brooder conditions and should be corrected promptly.
Feeding chicks like adult hens
Use stage-appropriate feed. BlogAgri’s Chicken Feeding Guide explains the progression without relying on one rigid feed schedule.
A Simple Brooder Checklist Before Chicks Arrive
I would want every one of these answered before bringing chicks home:
- Is the brooder clean?
- Is the heat operating?
- Is there both a warm and cooler area?
- Is the thermometer at chick level?
- Is the heater securely installed?
- Are combustible materials safely separated?
- Are electrical cords protected?
- Is clean water ready?
- Is appropriate starter feed ready?
- Is bedding dry?
- Is ventilation available without a floor-level draft?
- Is the enclosure escape-proof?
- Can predators reach it?
- Do I have a plan if the heat fails?
- Is the permanent coop being prepared before the chicks outgrow this space?
That last question is easy to ignore.
Chicks grow faster than your coop-building schedule.
FAQs About Chicken Brooders
What temperature should a brooder be for day-old chicks?
Extension guidance commonly starts around 90–95°F at chick level in the heated area. Use that as a starting range and adjust according to chick behavior and your heater’s instructions.
How can I tell if chicks are cold?
Cold chicks commonly huddle tightly beneath the heat source, peep sharply and may be reluctant to spread through the brooder.
How can I tell if chicks are too hot?
Chicks that consistently move away from the heater or begin panting may be too warm.
Why are my chicks all crowded into one corner?
One-sided crowding can indicate a draft. Check for air moving across the brooder at chick level.
Should brooder temperature drop 5°F every week?
A gradual reduction of about 5°F per week is common Extension starting guidance, but it should not override bird behavior, feather development and ambient temperature.
How long do chicks need supplemental heat?
There is no universal number of weeks. Age, feathering, breed, indoor or outdoor conditions and especially overnight temperatures all matter. University of Minnesota’s meat-bird guidance illustrates that well-feathered birds may need little or no heat relatively early under mild conditions but may need it longer during cold weather.
Is a brooder plate better than a heat lamp?
Both can work when appropriately sized and installed. Radiant plates provide localized heat, while lamps require particular attention to fire risk, mounting and clearance. University of Minnesota lists brooder plates among radiant heating options.
Are heat lamps dangerous?
They require careful installation because they operate at high temperature near combustible bedding and dust. Use livestock-approved equipment, follow manufacturer instructions, never hang a lamp by its electrical cord and secure it against falling.
Do chicken brooders need ventilation?
Yes. Chicks need fresh air and dry litter, but avoid directing cold drafts across them.
What should chicks eat in a brooder?
Use a complete chick feed appropriate to the type and age of bird and keep clean water available. See BlogAgri’s Chicken Feeding Guide for the full stage-by-stage feeding plan.
How much space do chicks need?
There is no useful universal number for every breed, age and brooder design. Provide enough usable room for all chicks to reach feed and water, rest and move between warmer and cooler areas, and increase space as they grow. Penn State specifically emphasizes increasing space as birds develop.
When can chicks go outside permanently?
Base the decision on feathering, weather, shelter and overnight lows rather than one fixed age. Birds raised during cold weather may need supplemental warmth longer than similarly aged chicks raised under mild conditions.
Final Thoughts
A brooder works best when you stop treating the thermometer as the boss.
Use it to establish a sensible starting temperature.
Then watch the chicks.
Chicks tightly packed beneath the heater are asking for more warmth or a better-heated area. Chicks hiding from the heater or panting are asking you to back off. Birds spread comfortably through the brooder are usually giving you the answer you want.
Keep the litter dry, give them fresh air without a direct draft and keep clean water and proper chick feed available.
And take the heat source seriously.
A securely installed brooder plate or properly mounted livestock heater is part of chick care. A hot lamp dangling over dry bedding by a weak clamp is a fire risk.
As the birds feather, gradually reduce their dependence on supplemental heat and start looking at the weather rather than only their age.
When the chicks are well feathered, comfortable without constant heat and ready for the actual overnight conditions outside, the brooder has done its job.
Sources and Further Reading
- University of Minnesota Extension — Raising Layer Chicks and Pullets — brooder preparation, heat, feeding, water and chick management.
- Penn State Extension — Brooding of Domestic Fowl — 2026 guidance on brooder temperatures, bird behavior and heat-lamp fire safety.
- Mississippi State University Extension — Poultry FAQs — practical chick behavior signs for cold, heat, drafts and comfortable conditions.
- University of Minnesota Extension — Caring for Chickens in Cold Weather — approved heaters, brooder plates and heat-lamp electrical/fire safety.
- University of Minnesota Extension — Raising Chickens for Meat — chick temperatures, feather development and weather-dependent supplemental heat.
- Penn State Extension — Space Should Increase as Birds Grow — why housing space should expand with bird growth rather than remain one fixed number.
