Email: blogagri2@gmail.com
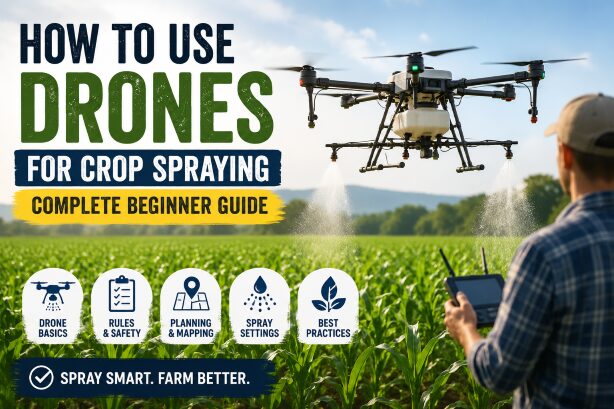
How to Use Drones for Crop Spraying: Beginner’s Guide
Using drones for crop spraying sounds exciting, but it is not as simple as filling a tank and pressing “start.”
You are flying an aircraft. You are applying crop protection products. You are working around weather, wind, neighbors, labels, state rules, and crop safety.
That may sound like a lot, but don’t worry. This guide breaks it down in plain English.
If you are a beginner farmer, drone operator, or landowner in the USA, this article will show you how to use drones for crop spraying safely, legally, and practically.
What Is a Crop Spraying Drone?
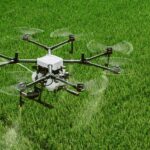
A crop spraying drone is an agricultural drone made to carry and spray liquid products over a field.
It is not the same as a normal camera drone.
A spraying drone has a tank, pump, spray nozzles or rotary atomizers, batteries, GPS guidance, and software that helps it follow planned flight paths.
Think of it like a small flying sprayer.
Instead of driving through the field with a tractor or calling a crop duster, the drone flies above the crop and sprays the product in controlled passes.
Most modern spray drones can map a field, follow automatic routes, avoid some obstacles, return when the battery is low, and continue the job after refilling.
Still, the drone does not make every decision for you. The operator is responsible for the product, rate, weather, drift, safety, and records.
How Does Drone Crop Spraying Work?
Drone crop spraying follows a simple idea.
You map the field, choose the spray settings, fill the tank, launch the drone, and let it spray along a planned route.
In real life, there are more steps.
Before spraying, you need to check the pesticide label, inspect the field, look at the weather, mark obstacles, test the drone, and make sure your application rate is correct.
Here is the basic workflow:
| Step | What You Do |
|---|---|
| Check rules | Confirm licenses, label directions, and state requirements |
| Inspect field | Look for wires, trees, people, animals, water, and sensitive crops |
| Map area | Set field boundaries and no-spray zones |
| Calibrate drone | Make sure the drone applies the right amount per acre |
| Mix product | Follow the label and wear proper PPE |
| Test with water | Check spray pattern before using pesticide |
| Spray field | Monitor wind, battery, tank level, and coverage |
| Clean and record | Rinse equipment and save application records |
That is the real beginner process. The flying part is only one piece of the job.
Is Drone Crop Spraying Legal in the USA?
Yes, drone crop spraying can be legal in the USA, but it is regulated. “FAA Part 137 rules for dispensing chemicals by drone”
This is where many beginners get confused. A spray drone sits between two worlds: drone law and pesticide law.
For many spraying jobs, you may need FAA approval, drone registration, Remote ID compliance, agricultural aircraft certification or exemption, and the right pesticide applicator license for your state.
You also need to follow the pesticide label.
That label matters a lot. If the label does not allow the product to be used in the way you plan to use it, you should not spray it by drone.
Here are the main things to check:
| Requirement | Why It Matters |
|---|---|
| FAA Remote Pilot Certificate | Needed for many commercial drone operations |
| FAA drone registration | Required for most work-use drones |
| Remote ID | Required for many registered drones |
| Part 137 approval or exemption | Often needed for spraying chemicals or agricultural products by aircraft |
| State pesticide license | Required for many pesticide applications |
| Product label | Tells you where, when, and how the product can be used |
| Insurance | Helps protect you from liability and drift claims |
A good rule for beginners is simple:
Do not spray until you are sure the flight, product, label, and state rules all line up.
When Does Drone Spraying Make Sense?
Drone spraying is not always the best choice, but it can be very useful in the right situation.
It works especially well when a ground sprayer cannot easily get into the field.
For example, maybe the field is too wet after rain. Driving a tractor through it could leave deep ruts and damage the crop.
Or maybe the crop is already tall, and a ground rig would knock plants down.
A drone can also help with small fields, steep ground, irregular field corners, or spot treatments where only part of the field needs attention.
Good situations for drone spraying include:
| Situation | Why a Drone Helps |
|---|---|
| Wet fields | No wheel tracks or soil compaction |
| Tall crops | Less plant damage |
| Small fields | Easier than moving large equipment |
| Steep or rough areas | Safer than driving equipment |
| Spot spraying | Treat only the problem area |
| Tight timing | Spray when ground rigs cannot enter |
For small farms and specialty crops, drones can be a smart tool. They can reach areas that larger machines may not handle well.
When Should You Avoid Drone Spraying?
A drone is not the right answer for every field.
You should avoid spraying when the wind is too strong, the label is unclear, sensitive crops are nearby, or you do not have the right license or training.
You should also avoid spraying near homes, gardens, livestock, ponds, streams, schools, roads, or bee yards unless you fully understand the risk and required buffer zones.
Drone spraying should not be done in a rush.
If the weather changes, stop. If the spray pattern looks wrong, stop. If the drone is not calibrated, stop.
One bad spray job can damage crops, waste money, and create complaints from neighbors.
A careful operator knows when to fly, but also knows when to wait.
Equipment You Need Before You Start
You need more than a spray drone.
A beginner setup should include the drone, batteries, charger, clean water, measuring tools, protective gear, spare nozzles, filters, weather meter, spill kit, and a recordkeeping system.
Here is a simple equipment checklist:
| Equipment | Why You Need It |
|---|---|
| Spray drone | Applies the product |
| Extra batteries | Keeps the job moving |
| Charger or generator | Recharges batteries in the field |
| Clean water | Used for mixing, testing, and rinsing |
| PPE | Protects you while mixing and cleaning |
| Measuring tools | Helps mix the correct amount |
| Weather meter | Checks wind and temperature |
| Spare nozzles | Helps fix clogs or worn parts |
| Filters | Keeps the spray system clean |
| Spill kit | Helps handle accidents |
| Field markers | Marks hazards or loading zones |
| Logbook or app | Saves application records |
Do not skip protective gear.
The drone keeps you out of the crop, but you still handle concentrated products while mixing, loading, and cleaning.
How to Use Drones for Crop Spraying Step by Step
Now let’s walk through the process in a practical way.
This is the part beginners usually need most.
Step 1: Read the Pesticide Label First
Start with the label before you touch the drone.
The label tells you the crop, pest, rate, timing, protective gear, buffer zones, re-entry interval, and application rules.
Look for aerial application instructions. Also check whether the product allows the spray volume and droplet size your drone can deliver.
Do not assume a product can be sprayed by drone just because it works in a ground sprayer.
If the label is unclear, contact your state pesticide agency, extension office, or product representative before spraying.
Step 2: Check Your Licenses and Local Rules
Before learning how to use drones for crop spraying in real fields, make sure your paperwork is right.
In the USA, this may include FAA drone requirements, agricultural aircraft rules, state pesticide licensing, business licensing, and insurance.
Rules can vary by state, so do not rely only on general online advice.
This step may feel boring, but it protects your farm, your business, and your neighbors.
Step 3: Inspect the Field
Walk or drive around the field before spraying.
Look for power lines, trees, poles, irrigation equipment, houses, roads, ponds, ditches, gardens, animals, workers, and nearby crops.
Also check the area where you will mix and refill the drone. It should be flat, safe, and away from wells, drains, and open water.
Many beginner problems happen because the operator did not inspect the field carefully.
Step 4: Map the Field Boundary
Use the drone app to create the field boundary.
Depending on the system, you may draw the boundary on a map, fly the drone around the edge, or walk the field with the controller.
Mark obstacles and no-spray zones clearly.
Do not rush mapping. A bad boundary can lead to skipped rows, overspray, overlaps, or unsafe flight paths.
Step 5: Choose Your Spray Settings
Your settings control how the drone applies the product.
The most important settings are flight height, speed, swath width, flow rate, droplet size, and gallons per acre.
Here is a beginner-friendly explanation:
| Setting | Simple Meaning |
|---|---|
| Flight height | How high the drone flies above the crop |
| Speed | How fast the drone moves |
| Swath width | Width covered in one pass |
| Flow rate | How much liquid comes out |
| Droplet size | Size of spray droplets |
| GPA | Gallons applied per acre |
| Overlap | How passes connect |
These settings work together.
If the drone flies faster, it may apply less product per acre. If it flies slower, it may apply more. If it flies too high, drift risk can increase.
This is why calibration matters.
Step 6: Calibrate the Drone with Water
Do not skip this step.
Calibration shows whether your drone is applying the amount you think it is applying.
For beginners, the safest way is to test with clean water first.
Fill the tank with a known amount of water. Spray a measured area. Then check how much water was actually used.
If the output is too high or too low, adjust the settings before using pesticide.
This may take extra time, but it can save a whole field from poor coverage.
Step 7: Mix the Product Safely
Once the drone is tested and the weather looks right, mix the product according to the label.
Wear the required PPE. Measure carefully. Use clean water. Mix only what you need for the planned area.
If you are mixing more than one product, check compatibility first. Some products can foam, thicken, separate, or clog the spray system.
Never mix near wells, ponds, streams, or drains.
Keep children, pets, and unnecessary people away from the loading area.
Step 8: Run a Short Test Pass
Before spraying the full field, run a short pass.
Watch the drone height, speed, spray pattern, turns, tank level, and return-to-home behavior.
Make sure the spray looks even.
If you see streaks, clogging, heavy overlap, or uneven output, fix the issue before continuing.
A short test pass is one of the easiest ways to avoid a bad first job.
Step 9: Spray in Small Sections
Beginners should not try to spray a large field all at once.
Start with smaller sections. This makes it easier to manage batteries, refills, wind, and coverage.
Watch the drone during the job. Watch the app too, but do not stare only at the screen.
Keep checking wind direction, battery level, tank level, spray output, and nearby activity.
If people, animals, or vehicles enter the area, pause the job.
Step 10: Clean the Drone and Save Records
After spraying, clean the tank, pump, filters, lines, and nozzles.
Do this according to the label and drone manual.
Poor cleaning can cause clogs, corrosion, crop injury, and cross-contamination during the next job.
Then save your records.
Record the date, field, crop, product, rate, acres treated, weather, wind direction, operator name, drone settings, and any issues.
Good records help with compliance and make your next application easier.
Example: Spraying a Small Soybean Field
Let’s say you have a 20-acre soybean field.
The field is wet after rain, and a ground sprayer may leave ruts. A drone might be useful here.
A smart beginner plan would look like this:
- Confirm the product is labeled for soybeans and the target pest.
- Check whether the product can be applied by air or by drone.
- Confirm your FAA and state pesticide requirements.
- Walk the field and mark power lines, trees, water, and neighboring crops.
- Map the field in the drone app.
- Calibrate with water.
- Spray a small section first.
- Watch wind and coverage during the job.
- Clean the system after spraying.
- Save complete application records.
The goal is not to finish as fast as possible.
The goal is to spray the right area, at the right rate, under the right conditions.
Drone Spraying vs Ground Sprayer vs Crop Duster
Drone spraying is useful, but it is not always better than traditional spraying.
Each method has a place.
| Feature | Drone Sprayer | Ground Sprayer | Crop Duster |
|---|---|---|---|
| Best for | Small areas, wet fields, spot spraying | Large fields and higher volumes | Very large acreage |
| Field damage | Very low | Can cause tracks and compaction | Very low |
| Speed | Medium | Fast | Very fast |
| Setup cost | Medium to high | High | Usually hired service |
| Access | Great for difficult areas | Limited by field conditions | Good, but needs safe airspace |
| Beginner difficulty | High | Medium | Usually handled by professionals |
If you are managing hundreds of acres with a short spray window, a drone may not replace a large ground rig or airplane.
But for wet spots, small fields, specialty crops, and targeted applications, it can be very helpful.
How to Reduce Spray Drift
Drift is one of the biggest risks in drone spraying.
Spray drift happens when droplets move away from the target area. This can damage nearby crops, gardens, water, or natural areas.
The best way to reduce drift is to slow down and check conditions before spraying.
University extension guidance also recommends paying close attention to wind direction, product label precautions, and sensitive downwind areas before applying pesticides.
Here are practical drift-control tips:
| Tip | Why It Helps |
|---|---|
| Check wind often | Wind can change during the job |
| Watch wind direction | Protects downwind areas |
| Use proper droplet size | Smaller droplets drift more easily |
| Keep correct flight height | Lower height can reduce drift risk |
| Respect buffer zones | Creates distance from sensitive areas |
| Avoid temperature inversions | Spray can move unpredictably |
| Stop when conditions change | Prevents off-target movement |
A good operator is not the one who sprays in every condition.
A good operator is the one who knows when to wait.
How Much Does Drone Crop Spraying Cost?
The cost depends on whether you buy a drone or hire someone.
Buying a spray drone can be expensive once you include batteries, charger, generator, training, licensing, insurance, maintenance, repairs, PPE, tanks, and transport equipment.
Hiring a drone applicator may be cheaper if you only need spraying a few times per season.
Here is a simple comparison:
| Option | Best For | Things to Consider |
|---|---|---|
| Hire a drone service | Occasional spraying | Per-acre cost, scheduling, travel fees |
| Buy a spray drone | Frequent farm use | Equipment, licenses, maintenance |
| Start a spray business | Custom work | Insurance, compliance, marketing, support gear |
Do not look only at the drone price.
Look at the full cost of operating it safely and legally.
Common Beginner Mistakes
Most drone spraying mistakes happen because someone rushed the job.
Here are the common ones:
- Spraying before checking the label
- Ignoring state pesticide rules
- Skipping FAA requirements
- Flying without proper calibration
- Spraying in poor wind conditions
- Flying too high above the crop
- Using the wrong nozzle or droplet size
- Forgetting nearby sensitive crops
- Mixing too much product
- Not cleaning the drone properly
- Keeping poor records
The easiest way to avoid these mistakes is to start small.
Practice with water. Spray a small area first. Learn how your drone behaves before taking on bigger jobs.
Beginner Checklist Before Your First Spray Job
Before your first real application, go through this checklist.
| Checklist Item | Done |
|---|---|
| FAA requirements checked | ☐ |
| Drone registered if required | ☐ |
| State pesticide rules checked | ☐ |
| Product label reviewed | ☐ |
| PPE ready | ☐ |
| Field inspected | ☐ |
| Obstacles marked | ☐ |
| No-spray zones added | ☐ |
| Weather checked | ☐ |
| Drone calibrated with water | ☐ |
| Batteries charged | ☐ |
| Nozzles and filters clean | ☐ |
| Spill kit ready | ☐ |
| Records prepared | ☐ |
If something is missing, pause the job.
Fixing a problem before spraying is always easier than dealing with damage later.
FAQs About How to Use Drones for Crop Spraying
Do I need a license to spray crops with a drone?
Yes, you may need more than one license or approval. In the USA, drone spraying can involve FAA rules, agricultural aircraft rules, state pesticide licensing, and product label requirements.
Can I spray any pesticide with a drone?
No. You must follow the pesticide label. If the product is not labeled for your crop, pest, timing, rate, or application method, do not use it that way.
Is drone spraying good for small farms?
Yes, it can be useful for small farms, especially for wet areas, irregular fields, specialty crops, and spot treatments. But small farms still need to follow the same safety and legal rules.
How many acres can a spray drone cover in a day?
It depends on tank size, battery life, spray volume, field shape, refill speed, weather, and operator experience. Drones can be efficient, but they may not match large ground sprayers for big acreage.
Are drones better than ground sprayers?
Sometimes. Drones are better for access, wet fields, and small targeted jobs. Ground sprayers are often better for large fields and high-volume applications.
What wind speed is safe for drone spraying?
There is no one perfect number for every job. Follow the pesticide label, drone manual, and local guidance. Wind direction and nearby sensitive areas matter just as much as wind speed.
Can I use a normal drone for crop spraying?
No. A normal camera drone is not built to carry liquid, control spray flow, or apply products evenly. You need a purpose-built agricultural spray drone.
Do I need insurance for drone spraying?
Insurance is strongly recommended, especially for commercial work. Drone spraying can involve liability for drift, crop damage, chemical exposure, and aircraft damage.
What records should I keep?
Keep the date, field, crop, product name, rate, acres sprayed, weather, wind direction, operator name, drone settings, and any problems during the job.
Final Thoughts
Learning how to use drones for crop spraying takes patience.
The drone is only one part of the job. You also need to understand labels, laws, weather, drift, calibration, crop safety, and recordkeeping.
Start small. Practice with water. Ask questions before spraying. Talk to your state pesticide agency, extension office, or an experienced applicator when you are unsure.
A spray drone can be a powerful tool on the farm, but it works best when it is used carefully.
The best operators are not the ones who fly the fastest.
They are the ones who spray accurately, protect nearby areas, follow the rules, and know when conditions are not right.